
In a digital era where websites are the face of businesses, blogs, and personal projects, one thing is certain: performance, security, and reliability are non-negotiable. As the digital landscape continues to evolve at breakneck speed, embracing the cloud has become an essential component of building and hosting websites that deliver a seamless user experience.
AWS, is a powerhouse in the cloud computing world, offering a suite of tools that can transform your static website into a high-performance, secure, and globally accessible masterpiece. In this article, we’re going to unravel the magic of AWS and guide you through the process of hosting a static website with three formidable services:
Amazon CloudFront,
Amazon Route 53 and
AWS Certificate Manager (ACM).
So, fasten your seatbelts as we embark on a journey through the cloud, exploring the seamless integration of these AWS services, and ultimately, discovering how to elevate your static website to new heights of performance and security. Your website’s future begins here, with CloudFront, Route 53, and ACM at your side.
Background
Let’s say you have a user who wants to access your website, the user will hit your DNS in a web browser, and there will be a DNS service that will have access to my bucket, in my case it will be Route 53 with AWS, the DNS service will have a CNAME record that will redirect the DNS to your cloud-front distribution, cloud-front is a Content delivery service-CDN, then cloud-front will be serving the static content from the s3 bucket, the s3 bucket will be accessed only from cloud-front using OAI- origin access identity, which is a secure method to access the bucket. Any user can not directly access the s3 bucket, this will not be permitted, since it’s not a secure practice.
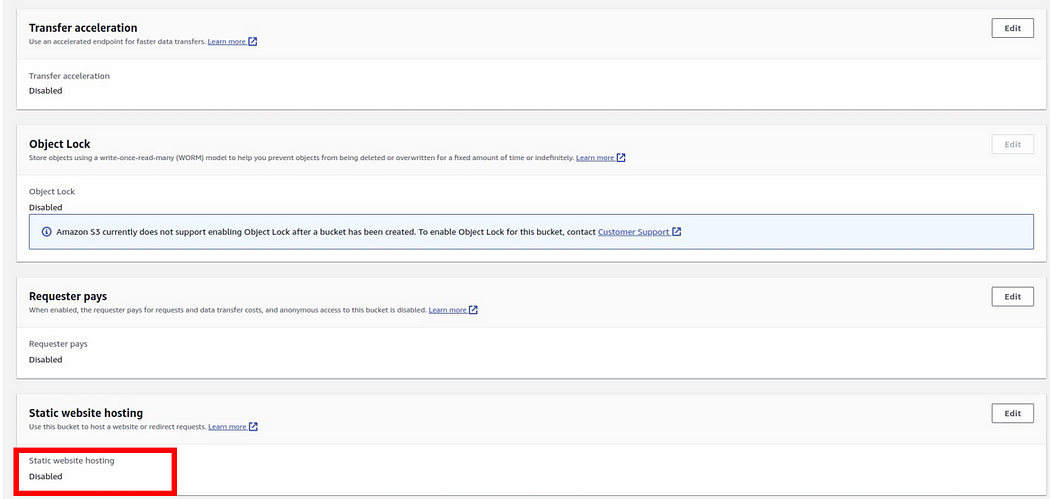
Again, when using Amazon S3 with CloudFront, it is necessary to turn off static web hosting on S3 (which is disabled by default under the “Properties” tab.) This is because CloudFront takes over content delivery, utilizing caching, edge optimization, and customization features, while static web hosting on S3 bypasses CloudFront and hinders performance.
Disabling static web hosting allows CloudFront to handle content delivery efficiently, leverage caching mechanisms, provide customization options, and streamline SSL certificate management for improved performance and scalability.
In addition, we will use ACM (AWS Certificate Manager) in front of the cloud front so that users will be able to access our website securely over HTTPS (data protection on transit).
Amazon Simple Storage Service (S3)

Amazon S3 is an object storage service that offers a scalable, high-speed, web-based cloud storage service. It is extremely durable and boasts of its “infinite” storage capacity. We can use Amazon S3 to store and retrieve any amount of data at any time, from anywhere.
What are S3 buckets?
S3 buckets are containers used to store objects. Objects are files along with the metadata (additional information) for them. Buckets offer unlimited storage capacity for objects, and high durability by replicating and storing the data across multiple devices in an Availability Zone.
What is CloudFront?
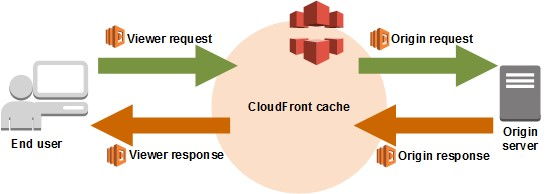
Amazon CloudFront is a service that delivers content, such as web pages and application data, with low latency, high scalability, and security. CloudFront caches (temporarily stores) content at Edge Locations stationed around the world near end-users. This improves response time by delivering the content from the Edge Location nearest to the user, instead of directly from the S3 bucket.
Amazon Route53
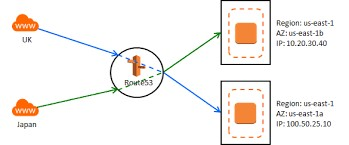
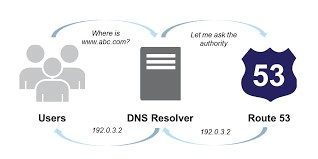
Amazon Route53 is a highly available and scalable Domain Name System (DNS) web service on AWS. The service gives developers a reliable way to direct clients to applications.
Origin Access Identity (OAI)
Origin Access Identity is a feature of Amazon CloudFront that allows access to private content stored on S3.
AWS Certificate Manager
AWS Certificate Manager allows easy provisioning, management, and deployment of public and private SSL/TLS certificates to use with AWS services and internal resources.
Static Website
A static website is a website that uses server-side rendering to serve pre-built HTML, CSS, and JavaScript files to a web browser. This characteristic leads to fast performance and lightweight overhead in simple use cases.
Bucket Policy
Bucket Policy is a resource-based policy of Amazon S3 that can be used to grant access permissions to buckets and objects.
prerequisites
· AWS account and IAM user (Free Tier)
· Website files (HTML, CSS)
· Basic Knowledge of DNS Records
Use Case
As a cloud engineer, I was tasked with creating a cost-effective and scalable solution for hosting a personal portfolio website for a client. The client requested a highly available website with low latency and the ability to handle traffic spikes.
Outcome:
By implementing S3 static website hosting and associated AWS services, I successfully created a highly available, scalable, and cost-effective solution for hosting the client’s personal portfolio website. The website experienced improved performance, and low latency, and could handle traffic spikes efficiently. Monitoring and cost optimization measures ensured that the client’s resources were used optimally, and adding ACM added an additional layer of data security.
Let’s get started.

Pull your coffee around, sip, and enjoy as we go along this simple task.
To complete these steps, you will need an AWS account. If you don’t have one, sign up for an account at aws.amazon.com.
Once you have an AWS account, sign in to your AWS Management Console.
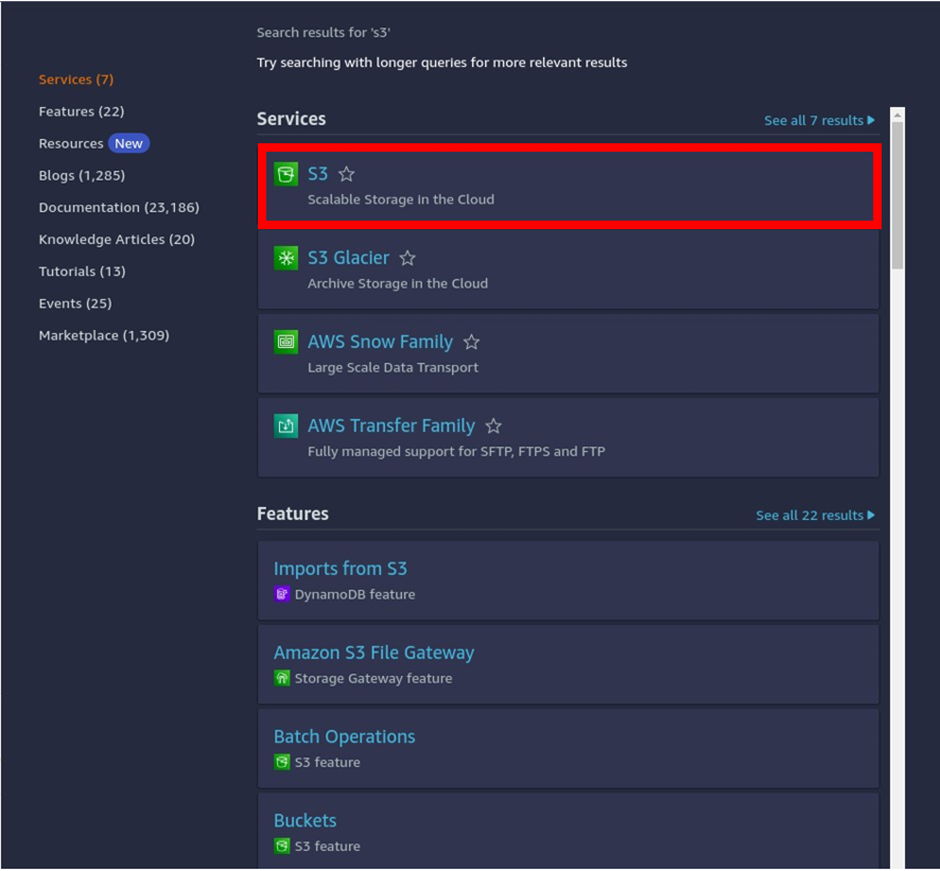
In the AWS Management Console type s3 in the search box, then select s3 under Services.
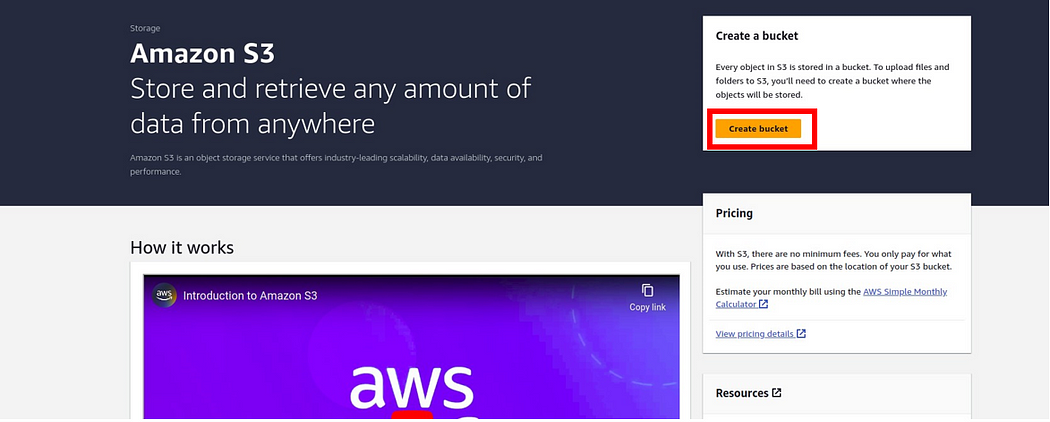
Then in the s3 dashboard, Click Create Bucket.
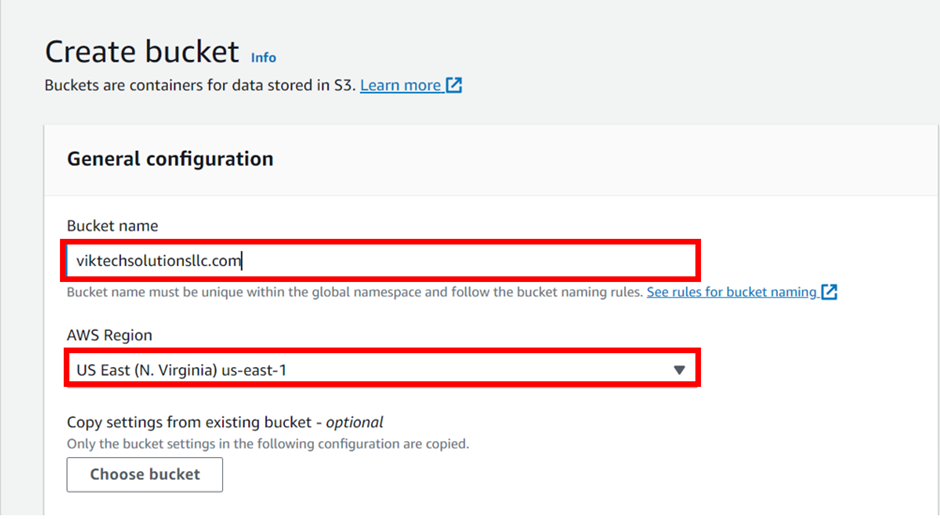
Then in the create bucket section, under bucket name, give your bucket a name, I will call mine viktechsolutionsllc.com Keep in mind, that bucket names must be Globally Unique across all AWS accounts, which means two buckets cannot have the same name. For the AWS region, we will create this bucket in the US-east-1 region, so select the dropdown and select US-EAST (N. Virginia) US-east-1.
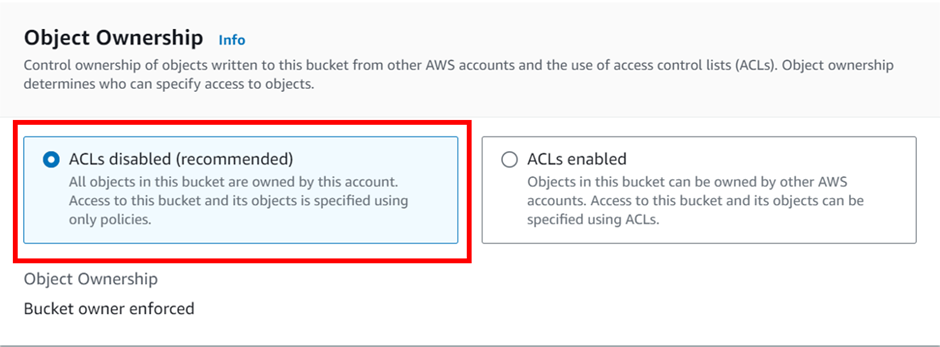
Scroll down, under Object Ownership. Make sure the radio button of ACLs is disabled (recommended)
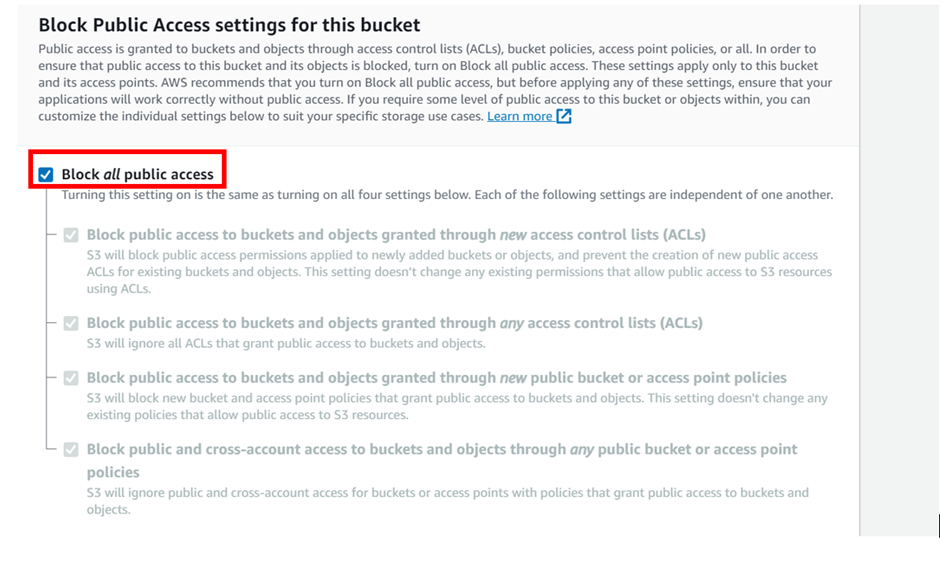
Scroll down and make sure the box on Block all public access is checked. remember we will be serving our static content through CloudFront origin access identity (OAI) and users will not be allowed to directly access our bucket content.
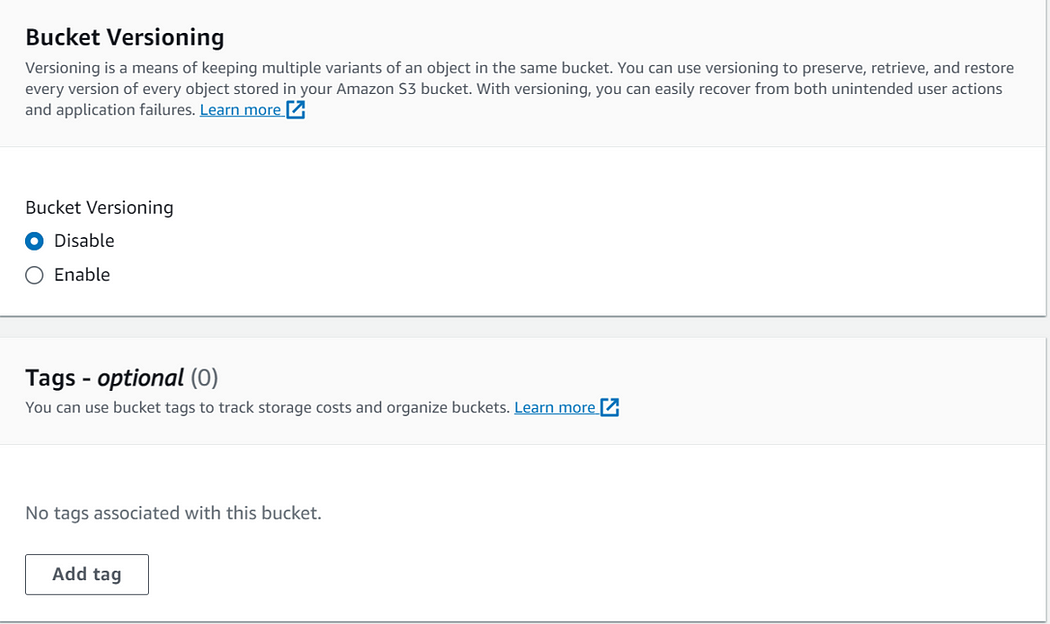
Scroll down, under bucket versioning, leave it on disable, a gain we will also leave tags as optional then scroll down.
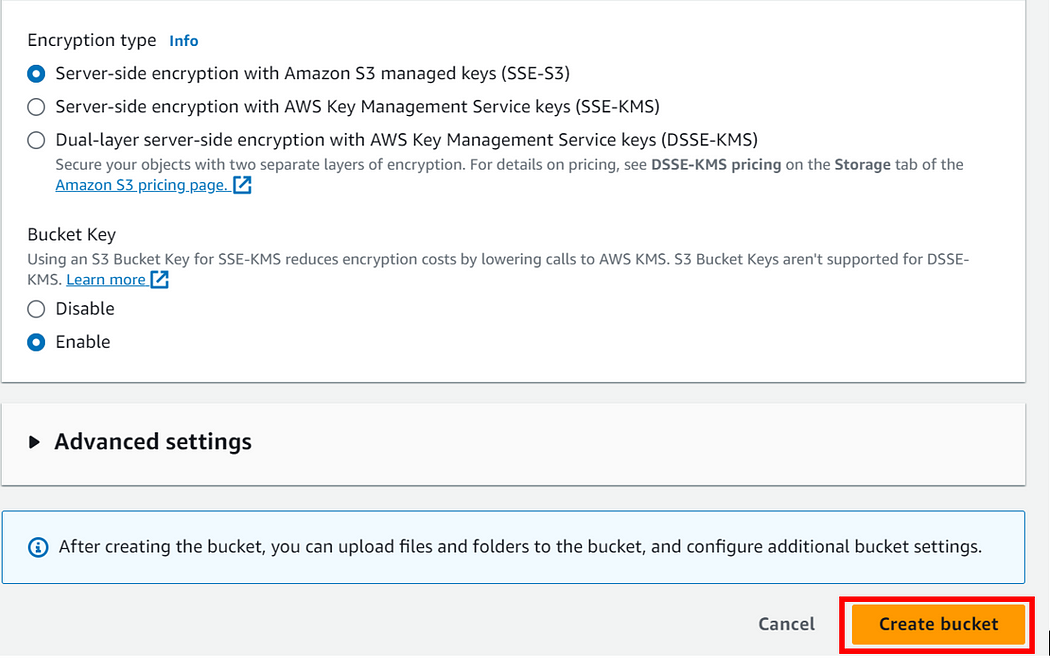
Under encryption, we will leave encryption and Object Lock settings at their default values. S3 automatically applies Server-side encryption (SSE-S3) as the default encryption method for new objects stored in the bucket. Then scroll down and click Create Bucket.
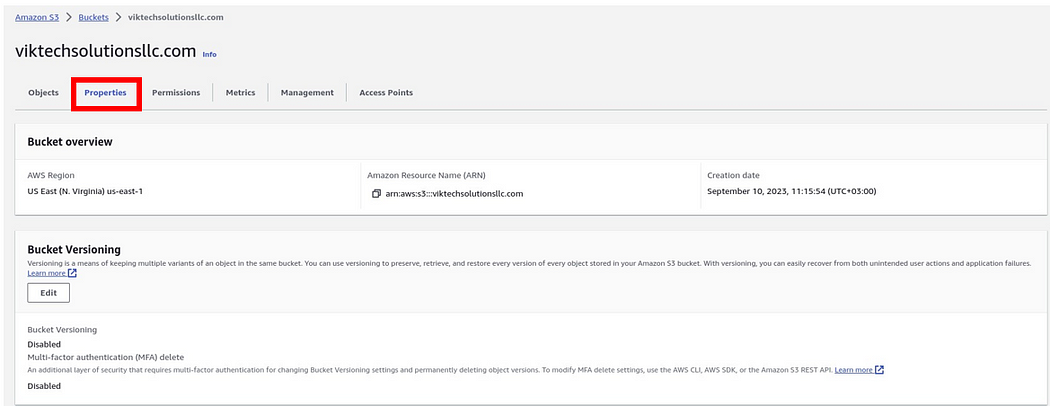
We have successfully created our s3 bucket viktechsolutionsllc.com

Disabling Static Website Hosting — When using Amazon S3 with CloudFront, it is necessary to turn off static web hosting on S3 (which is disabled by default under the “Properties” tab.) This is because CloudFront takes over content delivery, utilizing caching, edge optimization, and customization features, while static web hosting on S3 bypasses CloudFront and hinders performance.
Disabling static web hosting allows CloudFront to handle content delivery efficiently, leverage caching mechanisms, provide customization options, and streamline SSL certificate management for improved performance and scalability.
Now click on the bucket then go to bucket properties. scroll all the way down and make sure static web hosting is disabled.
Note that this service is always disabled by default. We are not enabling it because cloud-front will take over content delivery as explained earlier.
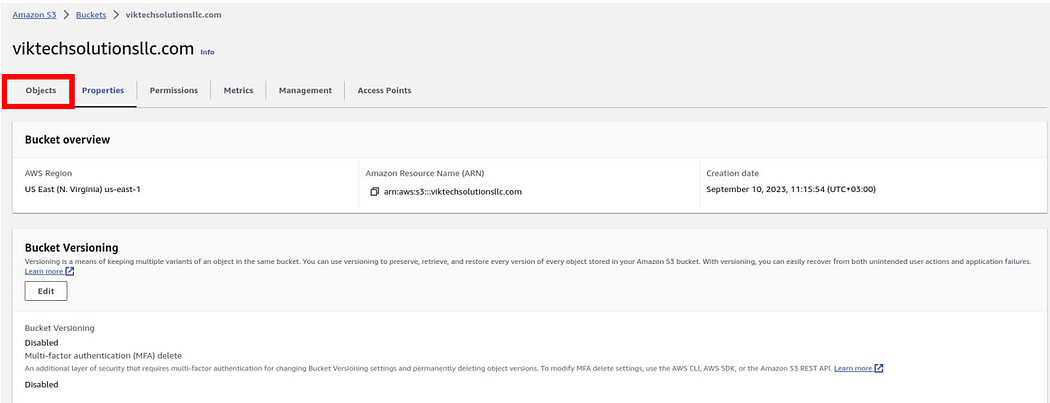
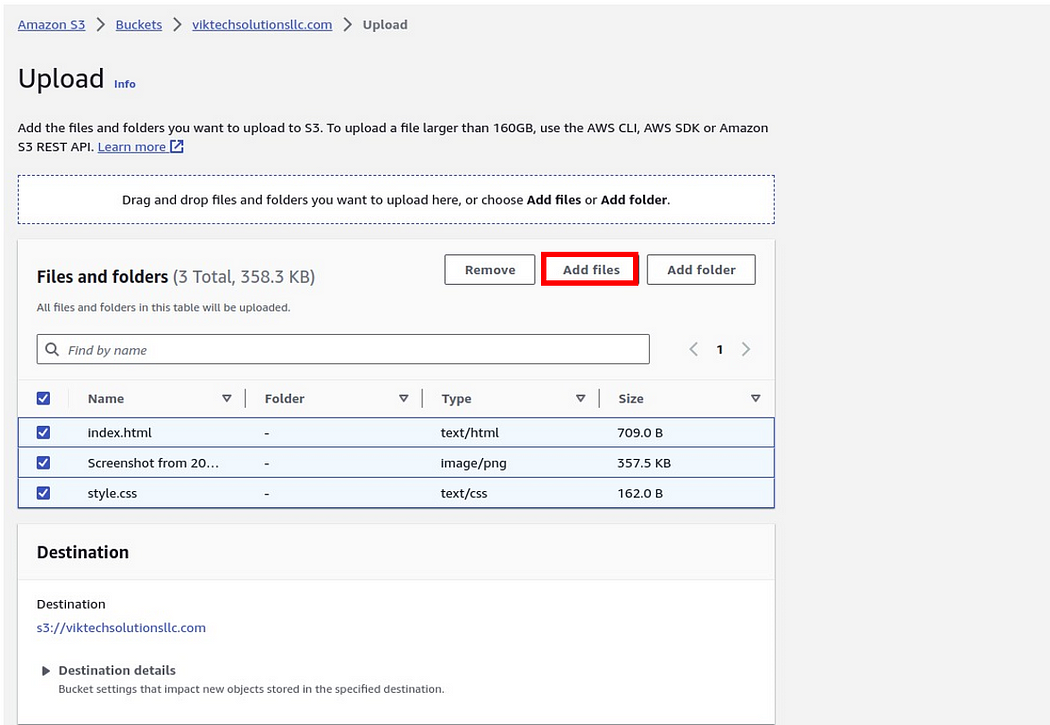
The next thing we will now do is to upload our Web files into the s3 bucket. move to the object tab, once you are there, select it then click Upload objects. in the upload tab, click Add files, this will take you to your local machine, open the directory containing your web files then select them. or you can just drag and drop them. for this demo, I used add files.
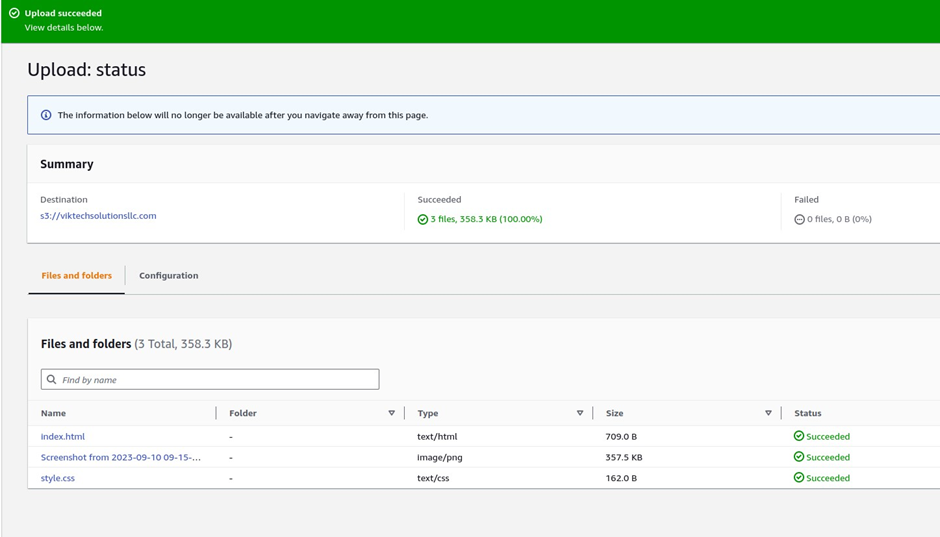
You should see Upload succeeded on the next page.
Setting Up CloudFront — While S3 provides reliable storage, we enhance the performance and global reach of our website by leveraging CloudFront, AWS’s Content Delivery Network (CDN). CloudFront caches and distributes your website’s content across a network of edge locations worldwide, reducing latency and improving the user experience.
Type CloudFront in the search box, then select CloudFront under services.
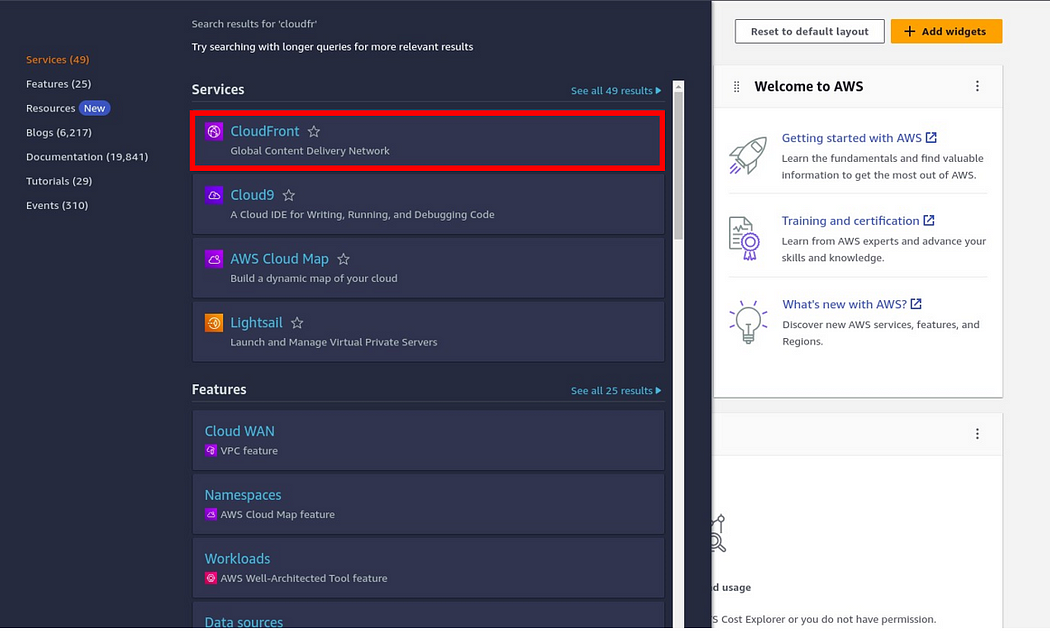
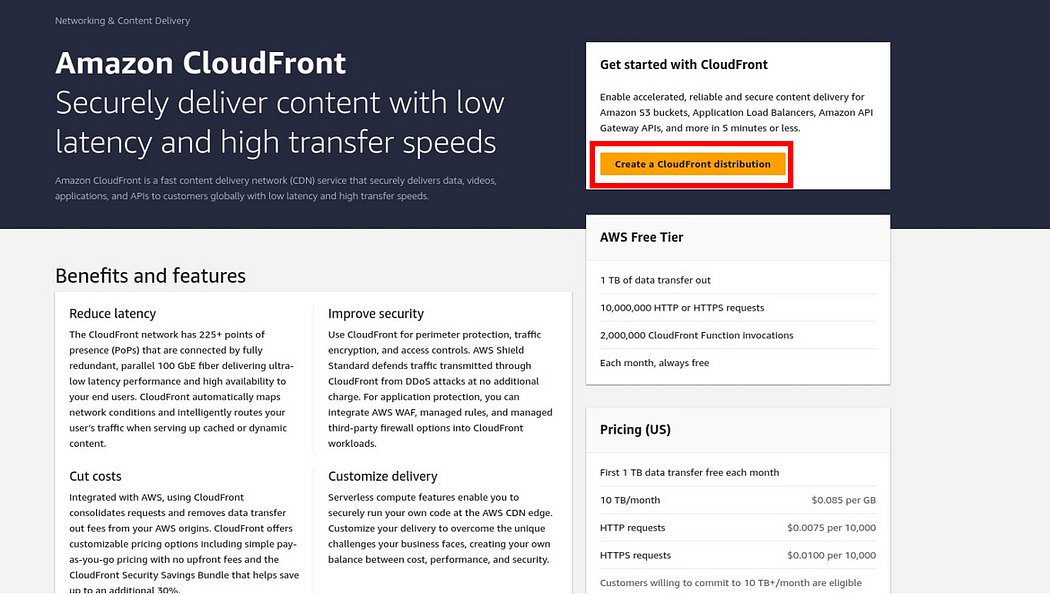
in the CloudFront dashboard, click Create Distribution.
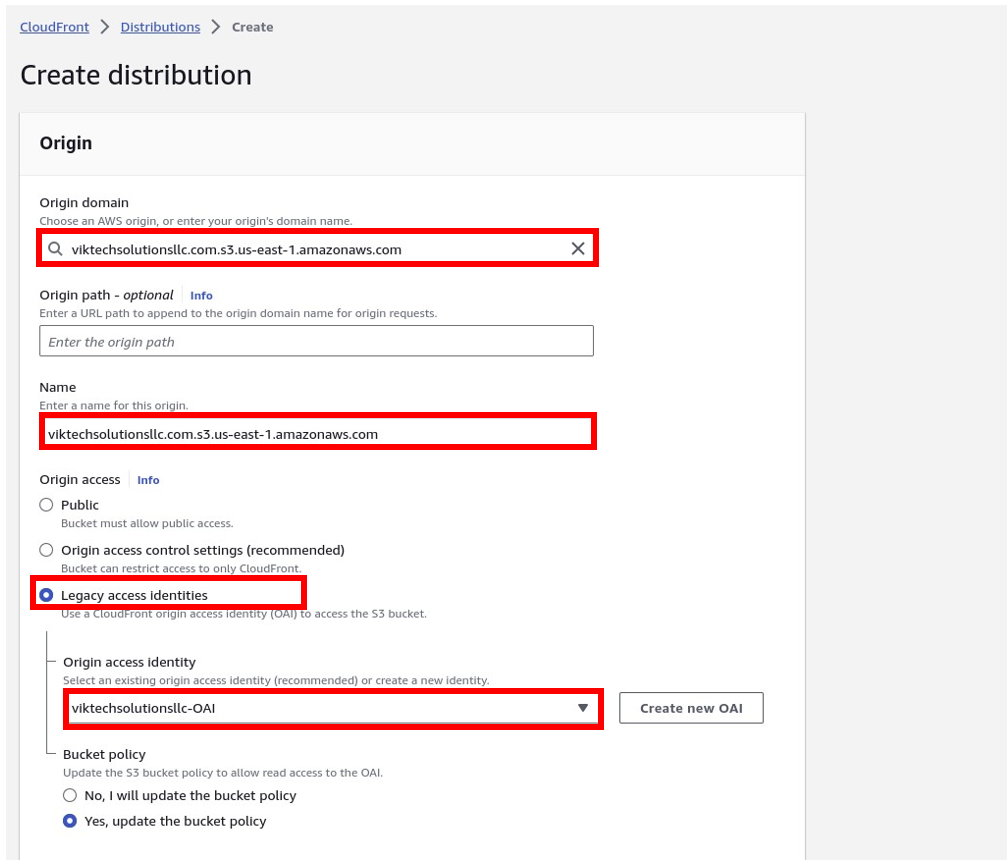
Then in the create distribution dashboard, under the origin domain, click the search box and your S3 bucket will automatically appear there then select it. Under the name, again the value selected under the origin domain will automatically appear there.
Under origin access, select legacy access identities, which use cloud-front origin access identities to access the s3, bucket.
Then under the origin access identity select the drop-down and select origin access identity, if you don’t have one, then click Create.
Scroll down.
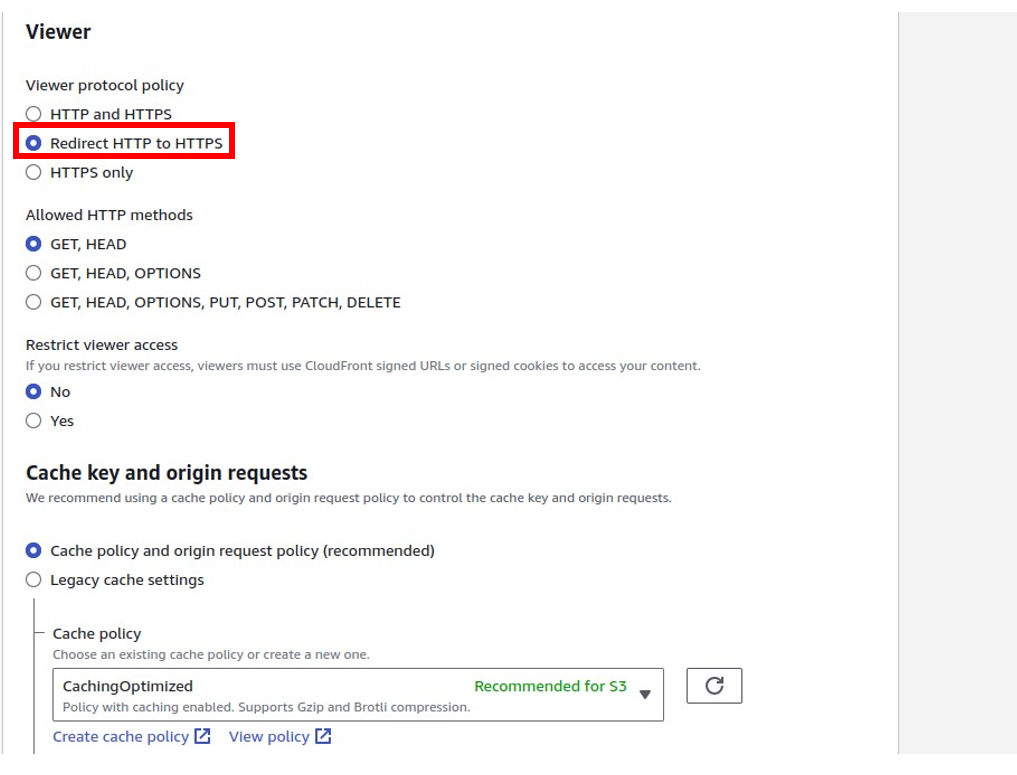
Under viewer protocol policies, select redirect http to https and
Under restrict viewer access, select NO and this is the default option, if you select yes, then viewers will have to use cloud-front preassigned URLs or preassigned cookies to access your content. Under cache key and origin, access leave it under caching optimized, this is the recommended one.
Then scroll down.
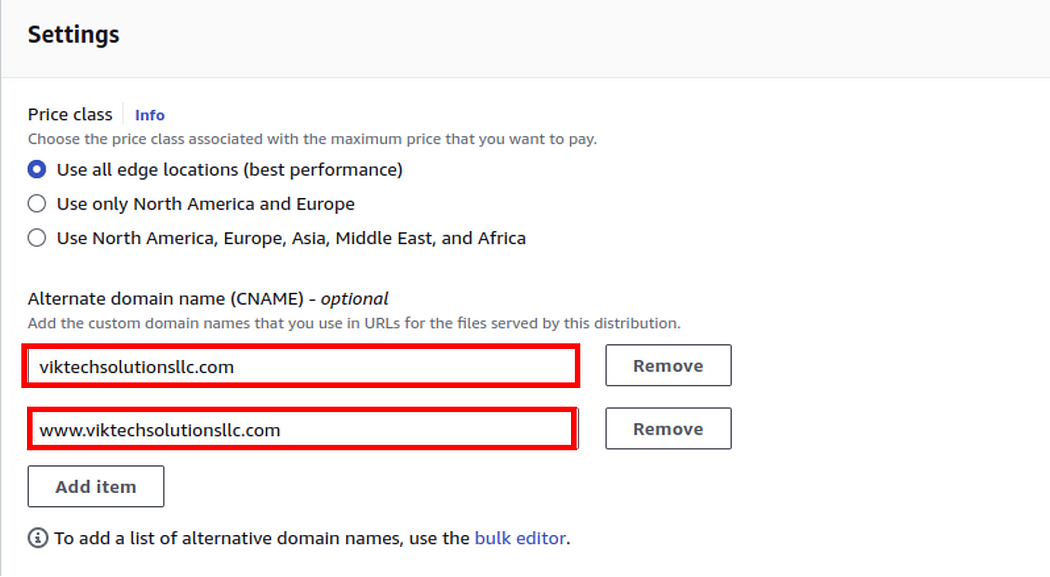
Under settings, select use all edge locations, then in the Alternate domain name section, enter your Domain name.
Under custom SSL certificate, since we don’t have any certificate, we will request one. click request a new certificate. This will take you to a new window.
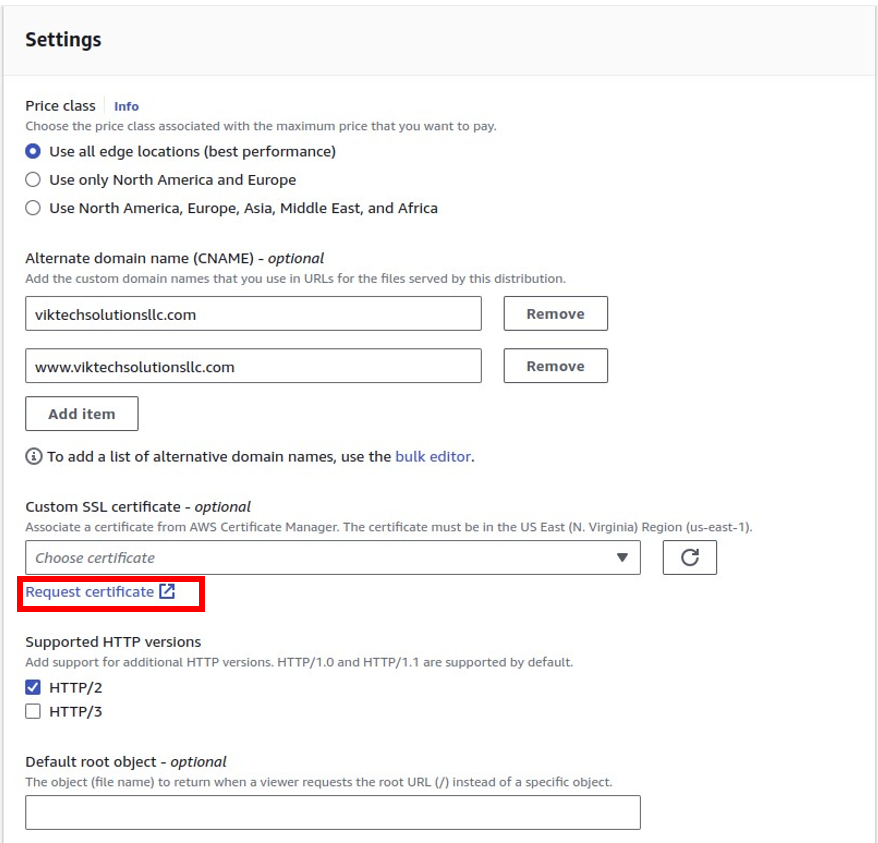
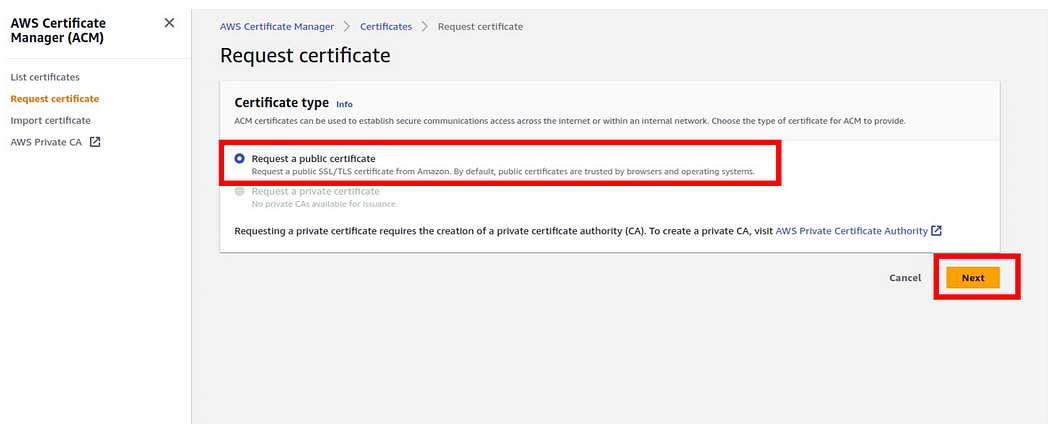
We will use the AWS certificate manager to request for public SSL certificate. In the request certificate dashboard select Request a public certificate by checking the radio button then click next.
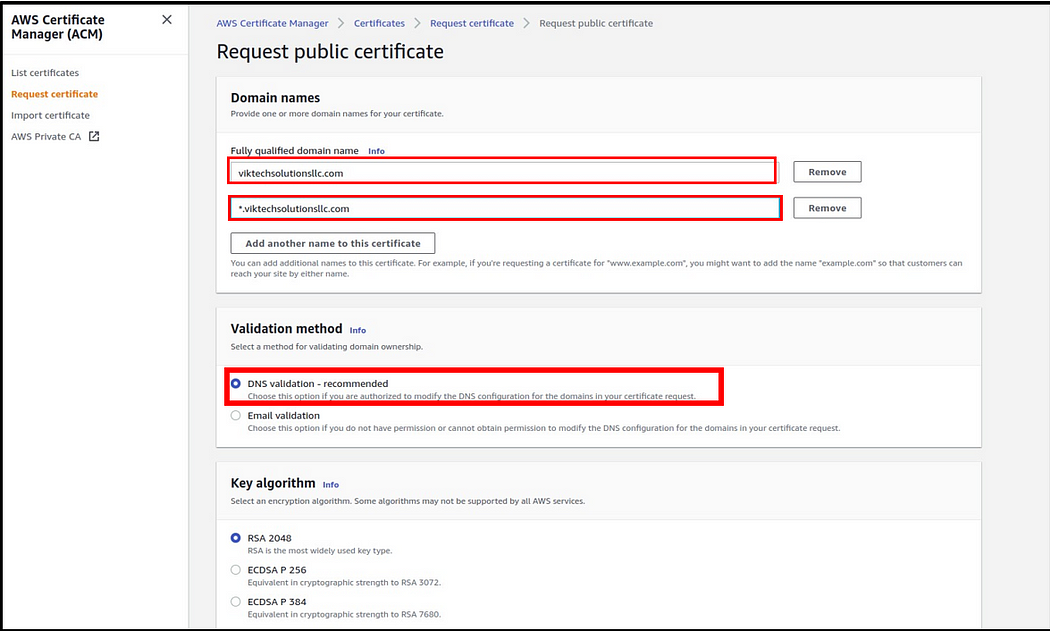
In the request public certificate dashboard, under the domain name, enter your fully qualified domain name, then add a wild card to your domain.
Under the validation method, select the DNS validation method, and this is the recommended one. Then Scroll down
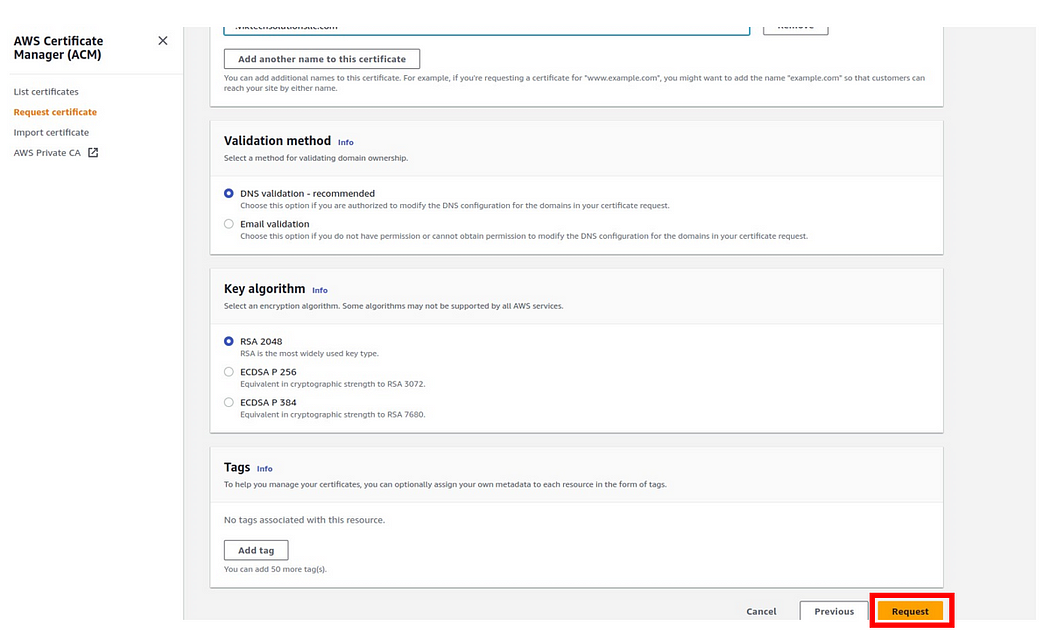
We will leave all the other options as default, then click request.
Our request has been successfully sent, and we can see the status ID, domain name, and the status is pending.
Click view certificates,

Click view certificates,

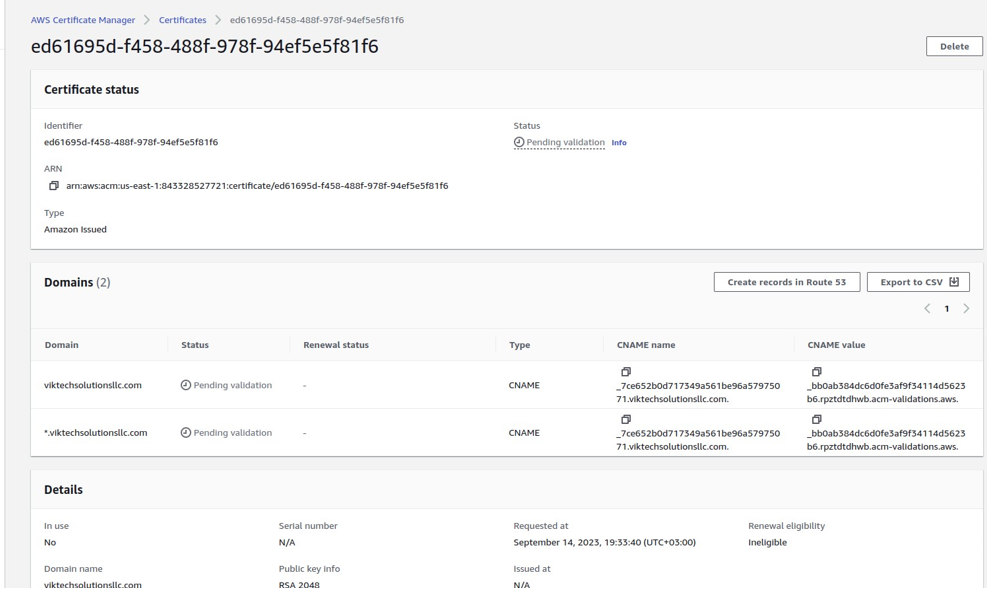
Our certificate status is pending because we have to validate it by creating records in Route 53.
If you purchased your domain from route 53, AWS has made this a very easy and simple task, just click Create Record in route 53.
You will be brought the create DNS records in Amazon Route 53 dashboard. Here, select all your domain names then click create record.
And there we go we have successfully created our domain name records in route 53
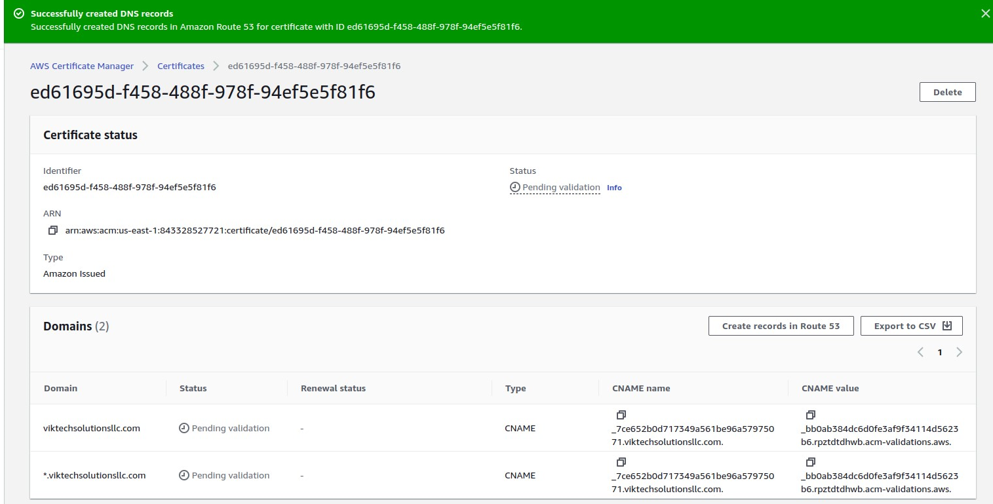
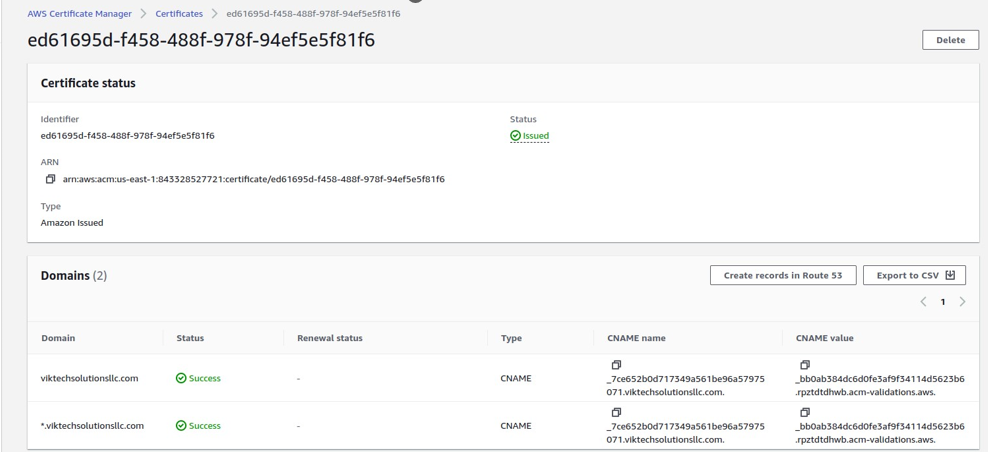
The status of our certificate is still pending, wait for a few minutes and then refresh the page, and there you will find your certificates issued.
Now come back to the CloudFront dashboard under settings and go back to your custom certificates, then select the drop-down and you will see your certificate available, then select it.
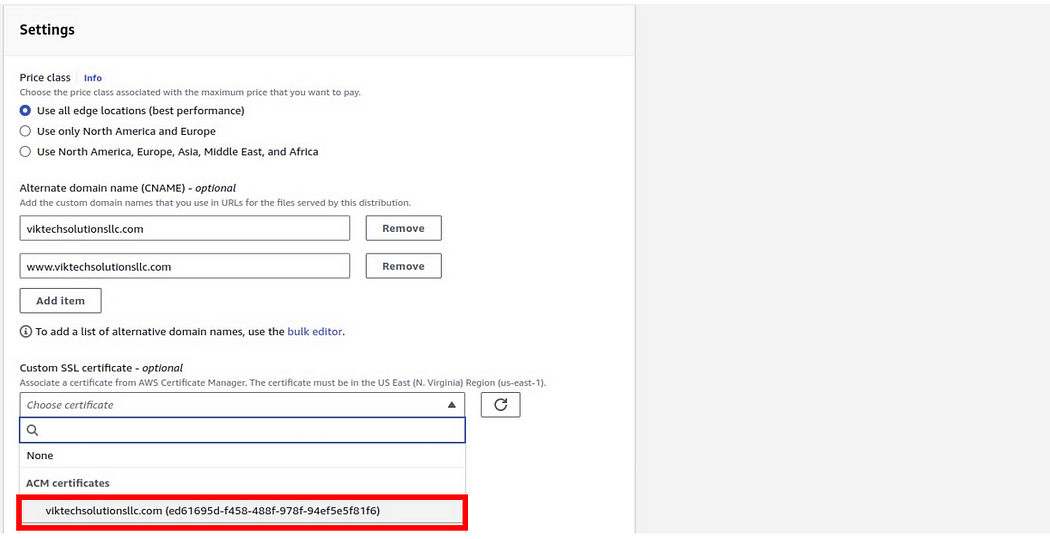
If it’s still not available, then just click the refresh button and it will be available.
After selecting it, leave everything as default then under the root object which is optional, modify the root object to “index.html,” which will be the default file served when accessing the website.
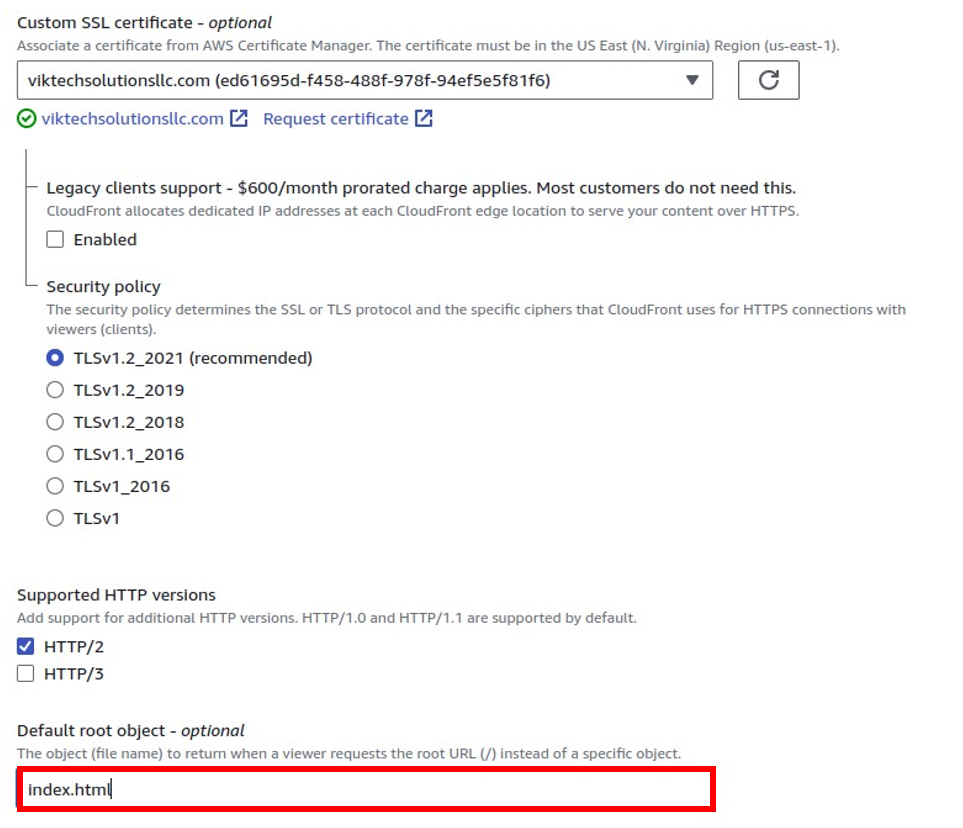
Click on the “Create Distribution” button and wait for approximately 5 minutes for CloudFront to complete the creation process. Once the distribution is successfully created, return to CloudFront and access the Distributions section.
And there we go, we have successfully created a new distribution,
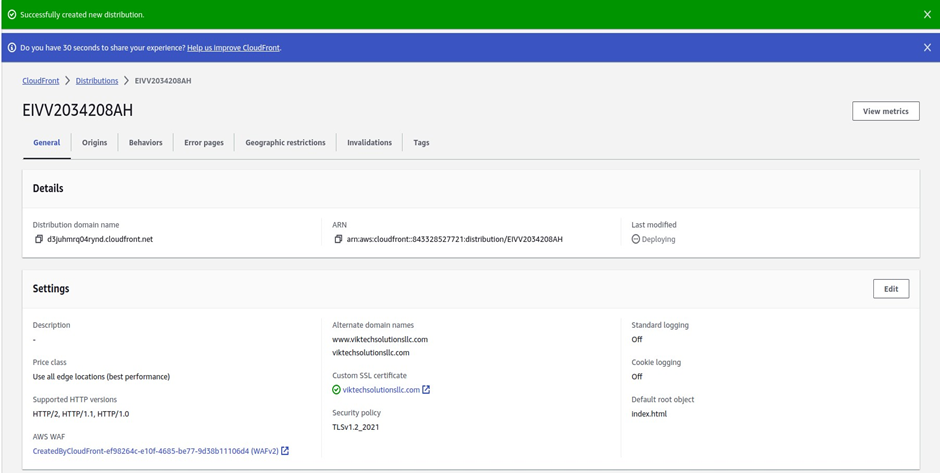
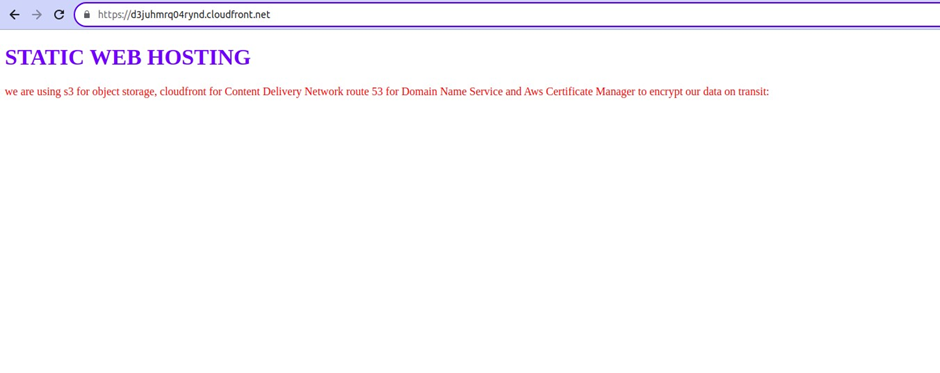
Then wait for the distribution to be deployed click its domain name and paste it into your web browser and there we go we can access our website from the cloud-front. As a gain, we can see our website is secured with https and we can see the lock icon.
However, instead of having a generic website name, we aim to deliver a professional and branded experience, which is why we will register our own domain using Route53. While you can opt for any domain registrar, since we are primarily utilizing AWS services for this project, it is convenient to utilize the native option.
Now to make our website accessible via our custom domain, we will have to go back to route 53 and create an A, record, and toggle Alias.
Let’s go to route 53, and click hosted zones,

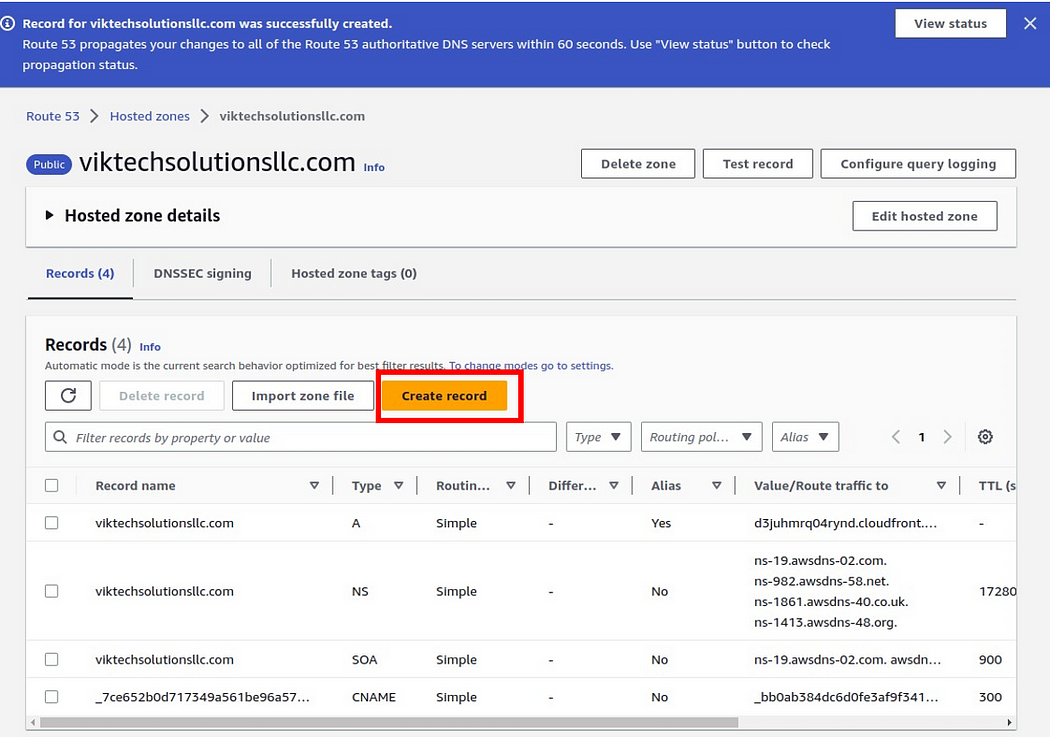
click create record,
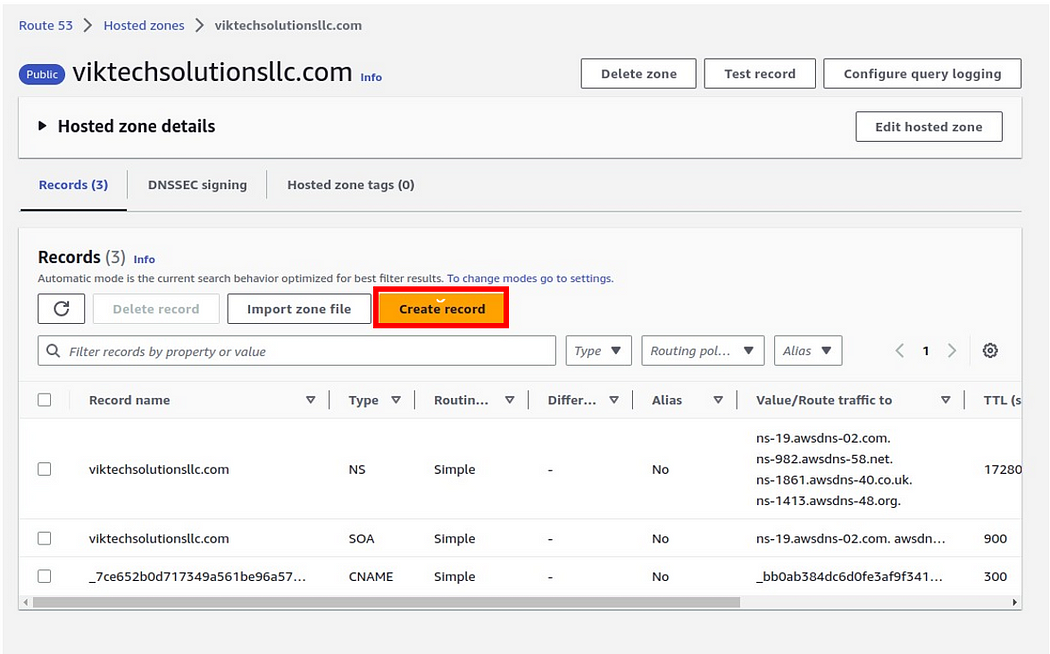
then select an A record, then toggle Alias. Then under route traffic to, select the dropdown and select CloudFront distribution, then select your CloudFront domain name, leave it at simple routing policy then click create record.
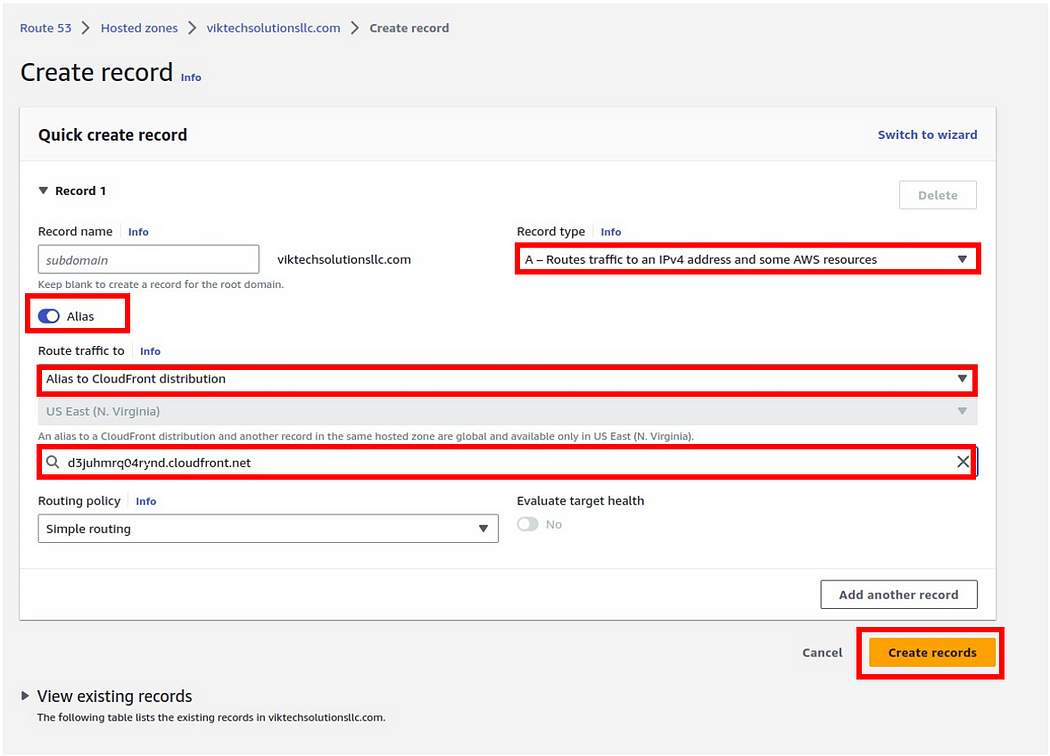
And there we go our record was successfully created.
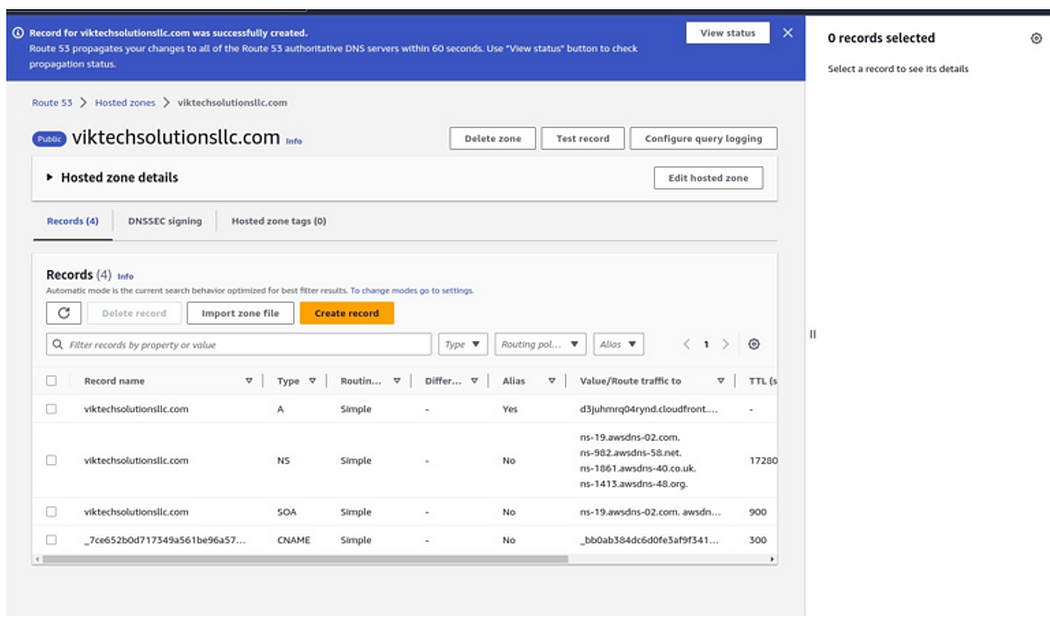
We move a gain create a CNAME record and forward everything to our domain name so that whenever anybody types www.ourdomain.com
He/she can still access our website.
Click Create Record.
Then under record name type www then under record type, select CNAME.
Again, under record value, we will forward this to our domain name, viktechsolutionsllc.com
Then click Create Record.
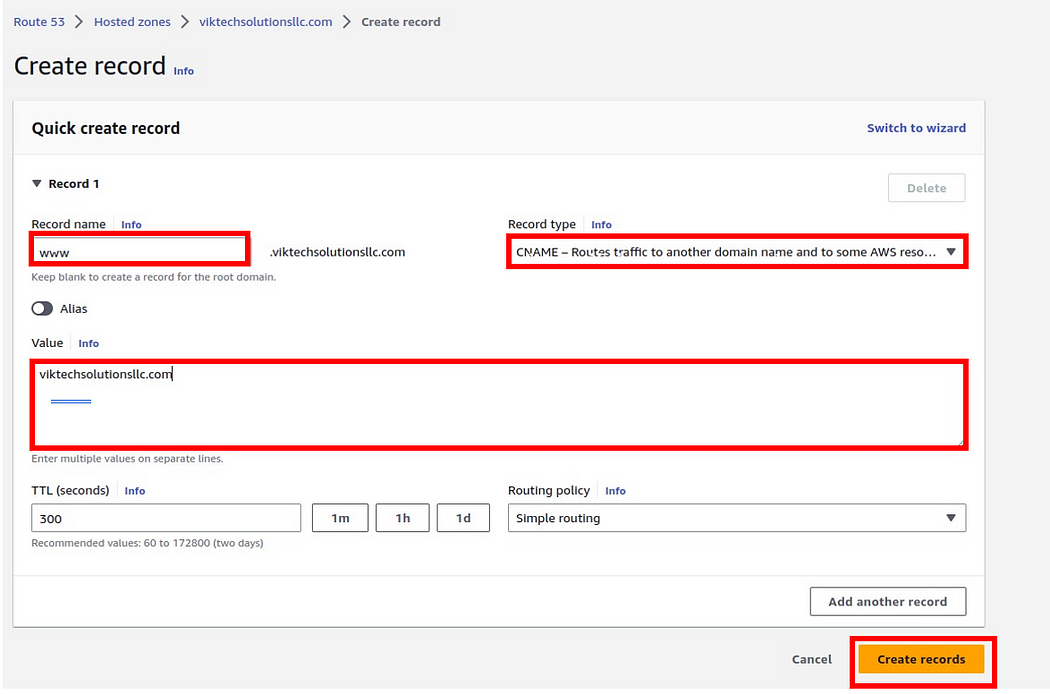
And there we go, we have created a CNAME record and forwarded www, to our domain name, so if you hit www.viktechsolutionsllc.com you will be able to access our website.
Now if you go back to your web browser and type www.viktechsolutionsllc.com, you will be able to access our website
Our website is secured with https.

pull everything down to avoid charges.
stay tuned for upcoming articles where we’ll explore advanced topics. Stay connected, stay inspired, and stay tuned for more!

A skilled Cloud DevOps Engineer and Solutions Architect specializing in infrastructure provisioning and automation, with a focus on building scalable, fault-tolerant, and secure cloud environments.
